Ombre vs Sombre: Key Differences
Learn the differences between ombre and sombre, when to use each gradient technique and professional formulas for perfect results.
Blendsor
Blendsor Team

Does your client ask for a “gradient” and you’re not sure if she really wants a dramatic ombre or a subtle sombre? Or worse, you do an ombre and she says she “wanted something more natural”?
If you work as a professional colorist, you know these two techniques sound similar but the results are radically different. Choosing wrong means an unhappy client, and that’s bad for everyone.
In this article, you’ll learn the exact differences between ombre and sombre, when to use each one, formulas that work and mistakes to avoid. This article is part of our complete guide to professional coloring techniques.
What is ombre and what is sombre
Ombre (from the French word for “shadow”) is a color gradient where roots are dark and the ends are significantly lighter, with a visible transition. The typical contrast is 4-6 levels of difference between root and ends.
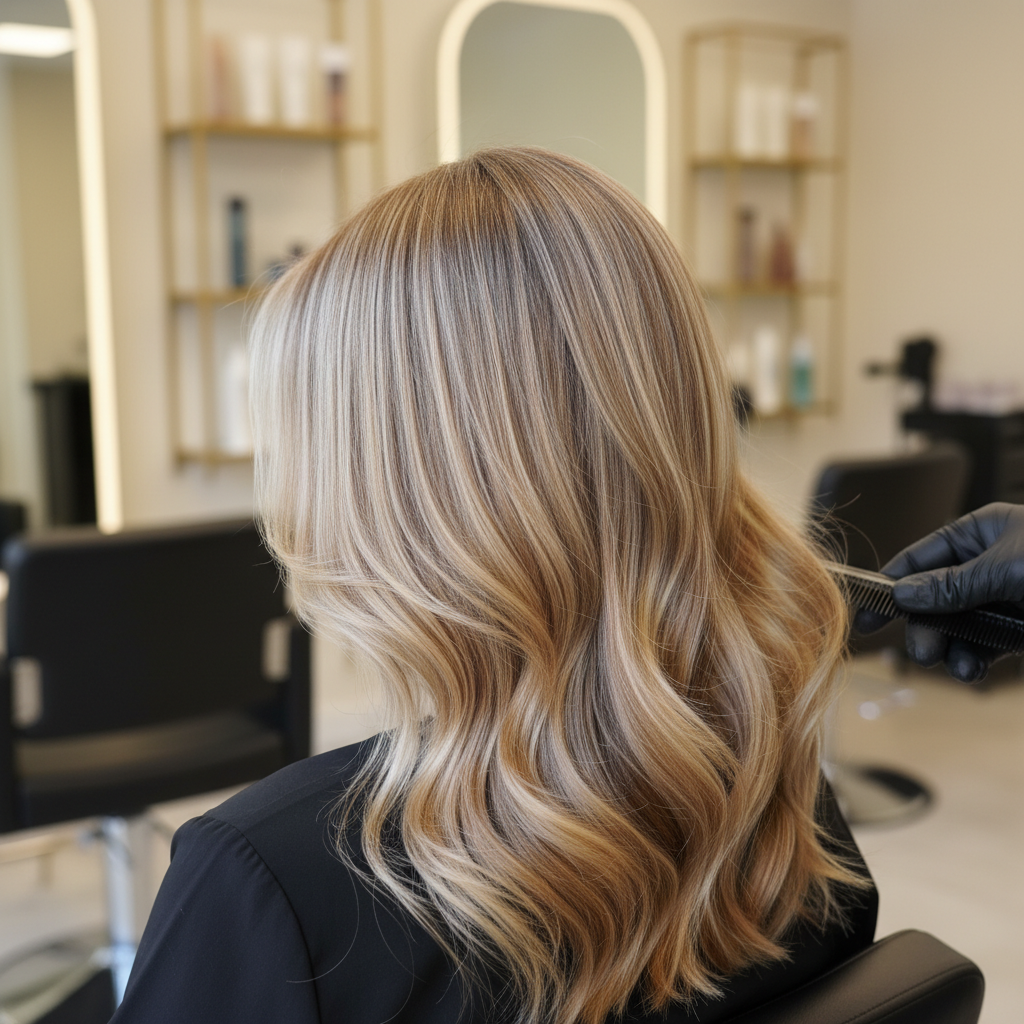
Sombre (from “soft ombre” or “subtle ombre”) is the softened version: the same concept of dark-to-light gradient, but with much less contrast, generally 1-3 levels of difference. The transition is so gradual it looks like the sun naturally lightened the hair.
According to Modern Salon, sombre has become the preferred technique for clients who want change without drama, while ombre maintains its place as an option for those seeking visual impact.
The key difference in one sentence
- Ombre = “You can clearly see there’s a gradient” (editorial effect)
- Sombre = “It looks like your hair grew that way” (natural effect)
Technical differences between ombre and sombre
Beyond contrast intensity, these techniques differ in product, process and maintenance.
| Factor | Ombre | Sombre |
|---|---|---|
| Contrast | 4-6 levels | 1-3 levels |
| Transition line | Visible, defined | Blended, gradual |
| Lightened area | From mids to ends | Only ends or lower thirds |
| Damage potential | Medium-high | Low-medium |
| Maintenance | Every 10-14 weeks | Every 12-16 weeks |
| Visual effect | Dramatic, editorial | Natural, “kissed by sun” |
| Best for | Bold looks, big changes | Natural looks, first services |
| Sessions needed | 1-2 (depending on base) | 1 generally |
Application process: ombre
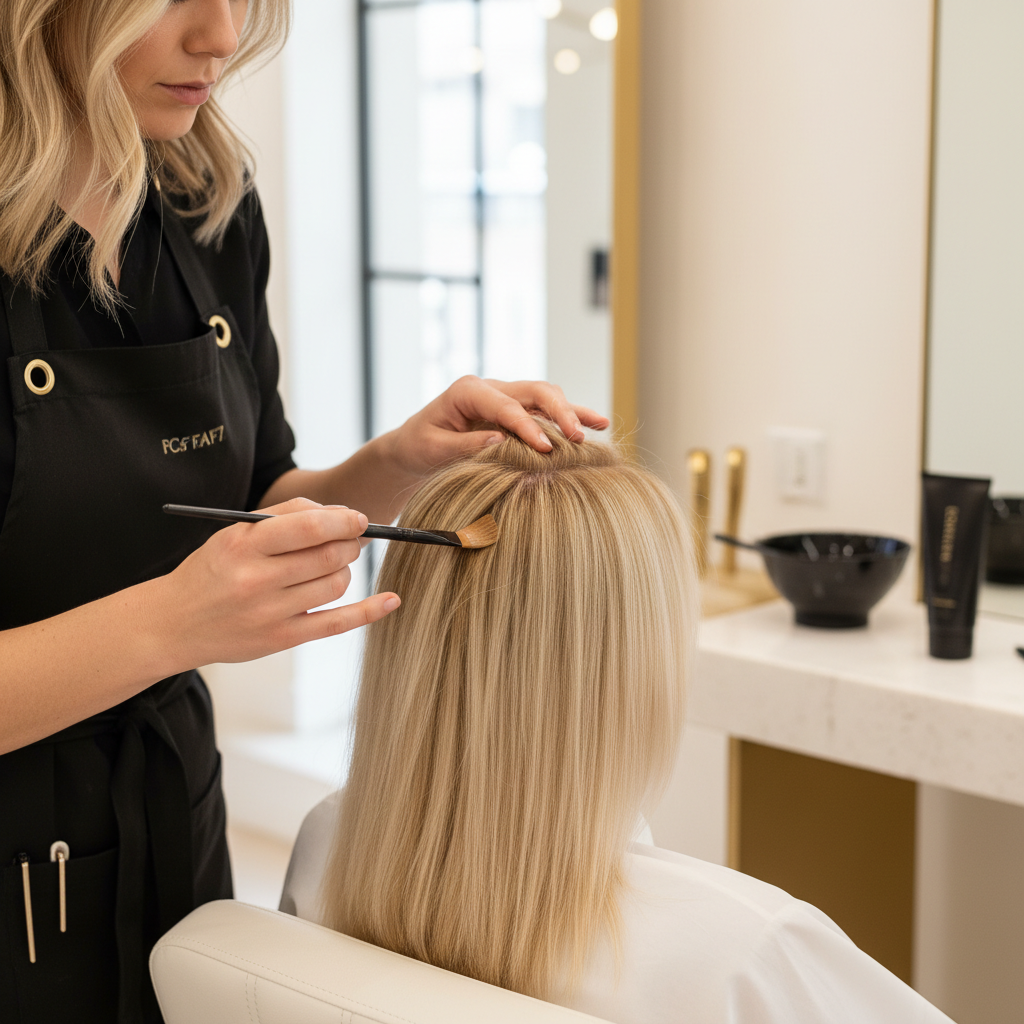
- Section hair into 4 quadrants
- Define the transition line (generally at jaw level or below)
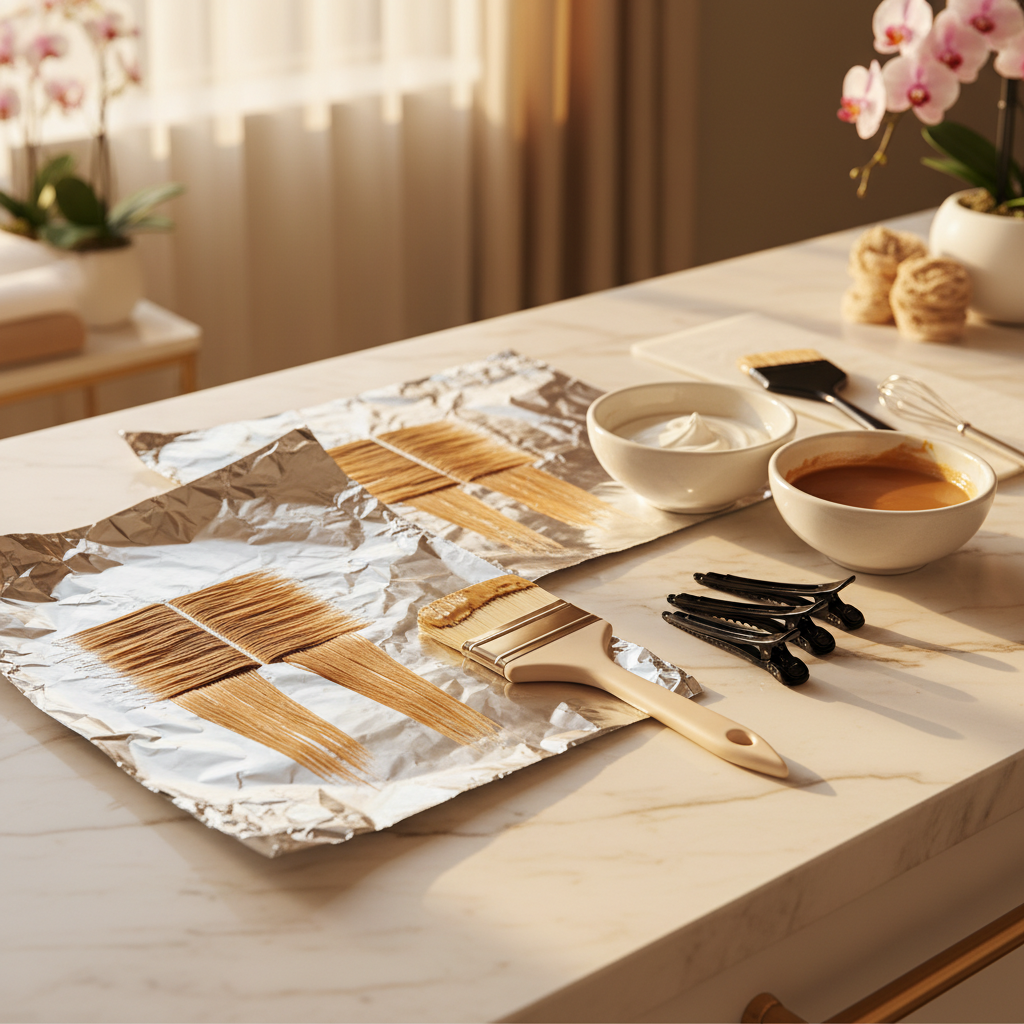
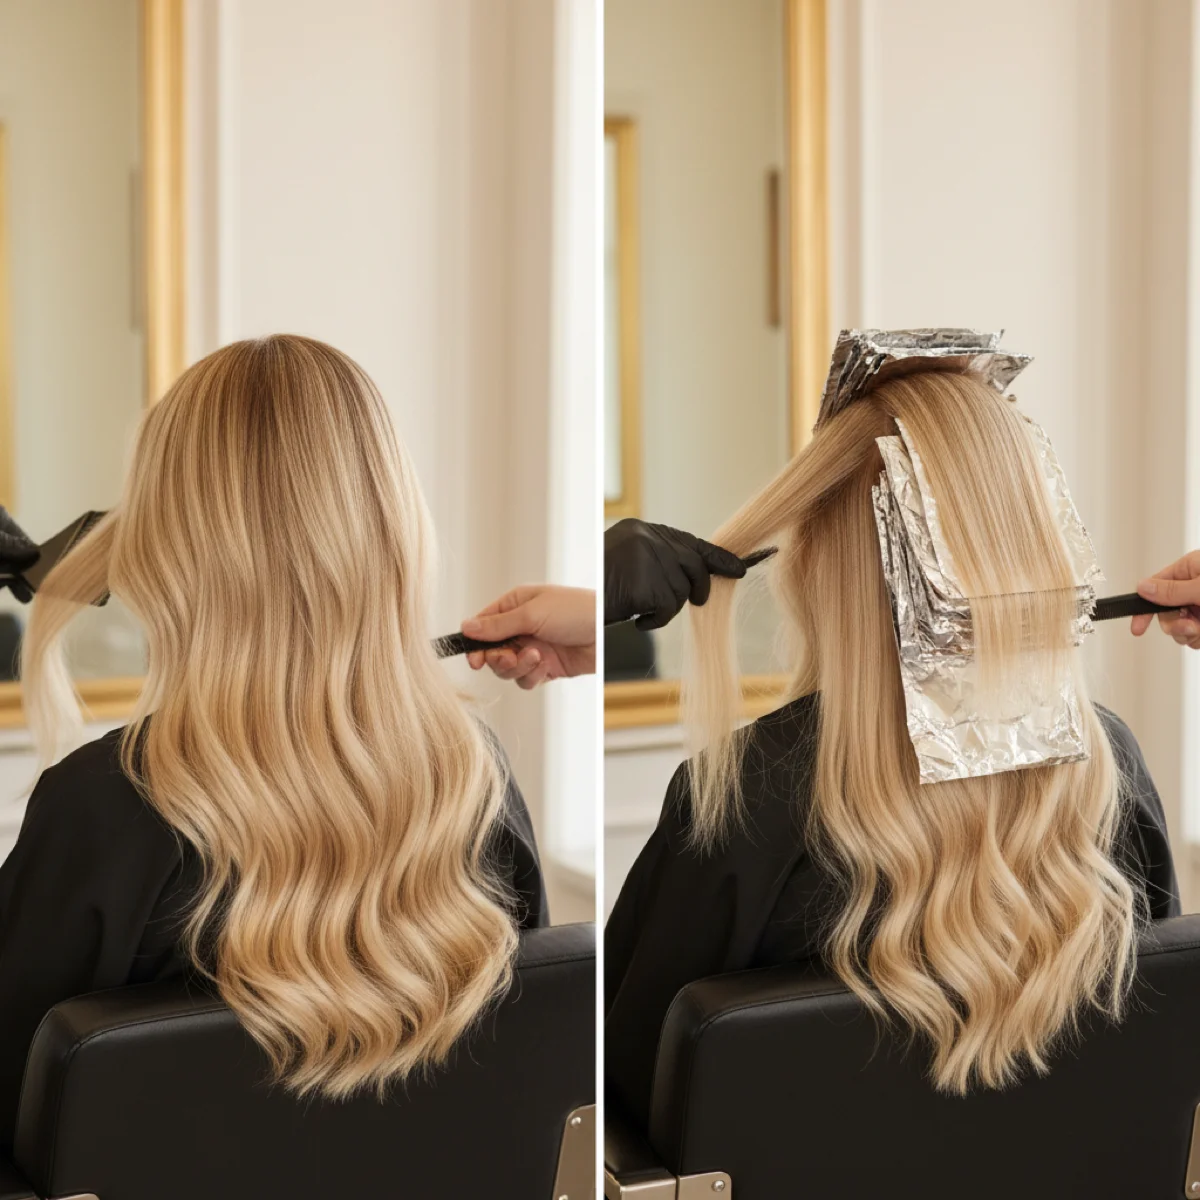
- Apply lightener with freehand technique or foils from the line down to ends
- Saturate ends well for maximum lightening
- Monitor development (30-45 min depending on goal)
- Tone to unify the shade of lightened areas
Pro tip: In ombre, the transition line is crucial. If it’s too abrupt, it looks like an accidental “dip dye.” Use a comb to blend the product in the transition zone.
Application process: sombre
- Section similarly, but with finer sections
- No defined line: apply with sweeping technique (similar to balayage)
- Less product: Apply smaller amounts in alternating sections
- Start lower: The lightened zone begins closer to the ends
- Reduced processing time (20-35 min, monitor frequently)
- Soft toning with translucent gloss

The key difference in application is that sombre has no clear line of demarcation. It’s a progressive fade. If you’ve mastered balayage, you already have the technical foundation for sombre.
When to use ombre vs sombre
The choice depends on what your client wants to achieve and the condition of their hair.
Choose ombre when
| Situation | Ombre? | Reason |
|---|---|---|
| Wants a visible, bold change | Yes | High contrast makes an impact |
| Dark base (level 2-5) wants light ends | Yes | Natural contrast is already high |
| Special event or photo shoot | Yes | Editorial and photogenic effect |
| Already has lightened ends | Yes | Just needs to reinforce |
| Wants total low maintenance | Yes | Natural root grows without demarcation |
Choose sombre when
| Situation | Sombre? | Reason |
|---|---|---|
| First time wanting change | Yes | Low risk, easy to love |
| Wants “something but not too much” | Yes | Subtle and reversible |
| Medium-light brown base (level 5-7) | Yes | Soft contrast works better here |
| Worried about damage | Yes | Less lightening needed |
| Wants it to look natural | Yes | Gradual transition mimics the sun |
| Fine or delicate hair | Yes | Less chemical aggression |
When neither works
- Very damaged hair: Prioritize health before lightening techniques
- Abundant gray hair: Gradients don’t camouflage grays (better professional coverage)
- Wants dimension without gradient: Better highlights + lowlights
Professional formulas for ombre and sombre
Ombre on dark base (level 3-4)
Goal: Ends at level 8-9, high contrast
Transition zone (mids):
- Lightener + 20 vol developer
- Apply with comb to blend
- 25-30 min

Ends:
- Lightener + 30 vol developer
- Saturate completely
- 35-40 min (monitor)

Toner:
- 9.1 + 9P (1:1) + 10 vol
- 15-20 min
Sombre on dark base (level 3-5)
Goal: Ends at level 6-7, subtle change
Ends and lower thirds:
- Lightener + 20 vol developer
- Fine sections, sweeping technique
- 25-30 min

Toner:
- 7.3 + 7N (1:1) + 10 vol
- 15 min
Sombre on light brown base (level 6-7)
Goal: Ends at level 8-9, “kissed by sun” effect
Ends:
- Lightener + 20 vol developer
- Very subtle sweeping, ultra-fine sections
- 20-25 min

Toner:
- 9.01 + 10 vol (translucent gloss)
- 10 min
Pro tip: In sombre, translucent toner is your best friend. An opaque toner can mask the subtlety of the gradient. Always opt for a gloss or demi-permanent. For more on this topic, check our guide on professional hair gloss.
Ombre and sombre combined with other techniques
These techniques don’t exist in isolation. The best combinations:
Sombre + Shadow root
The perfect combination for low maintenance. The shadow root creates a blended root zone of 2-4 cm that connects with the sombre gradient. The result is a look that takes months to need a touch-up.
Ombre + Face framing
Combine ombre with lighter highlights around the face to illuminate features. The contrast of the ombre in the body of the hair plus brightness around the face creates a very photogenic effect.
Sombre + Babylights
For maximum naturalness. Babylights in the upper zone create micro points of light that blend with the sombre gradient. Ideal for brunettes who want an imperceptible but transformative change.

Common mistakes and how to avoid them
1. Ombre with too hard a line
The mistake: Not blending the transition zone, creating a visible horizontal line.
The consequence: Looks like a 2010 “dip dye,” not a modern ombre.
The solution: Use a comb for gentle backcombing in the transition zone before applying. This creates shorter strands that blur the line.
2. Sombre with no visible difference
The mistake: Being so subtle that no change is noticeable.
The consequence: Client who paid for nothing visible.
The solution: Minimum 2 levels of difference. If the base is level 6, the ends should reach at least level 8 to be appreciated.
3. Not adapting to skin tone
The mistake: Choosing the gradient temperature without considering skin undertone.
The consequence: Shades that don’t flatter, artificial appearance.
The solution: Warm skin → golden/honey gradient. Cool skin → ash/beige gradient. Neutral skin → both work.
4. Over-processing the ends
The mistake: Leaving lightener too long on already porous ends.
The consequence: Dry, broken ends with straw-like texture.
The solution: Apply to the transition zone first (more resistant) and add ends 10-15 minutes later. The ends are already more porous and process faster.
5. Confusing ombre with balayage
The mistake: Using the terms interchangeably when they’re different techniques.
The consequence: Misaligned expectations with the client.
The solution: Ombre is the result (dark-to-light gradient). Balayage is the application technique (freehand sweeping). You can achieve an ombre using balayage, but they’re not the same thing.
Frequently Asked Questions
How long does ombre vs sombre last?
Ombre lasts 4-6 months without retouching because the natural root grows without creating an abrupt line of demarcation. Sombre lasts even longer, up to 6-8 months, thanks to the soft transition disguising growth. Both are low-maintenance techniques compared to traditional highlights.
Can you convert an ombre to sombre?
Yes, and it’s quite straightforward. Apply lowlights or a demi-permanent tint in the transition zone to soften the contrast. This reduces the level difference and converts the dramatic gradient into a more subtle one. It’s a good option for clients who are tired of high contrast.
Ombre or sombre on short hair?
On hair above the shoulders, sombre works better. Ombre needs length for the transition to develop; on short hair, the line ends up too close to the root and the effect is lost. With a bob, subtle sombre on the last 5-8 cm can work well.
Which one damages hair more?
Ombre causes more damage because it requires lightening ends to higher levels (4-6 levels of lift vs 1-3 for sombre). However, both techniques concentrate damage on mids and ends, leaving roots intact. This means new hair grows healthy, unlike full highlights.
Can these be done on previously colored hair?
Yes, but with caution. On hair with previous color, bleaching can give unpredictable results depending on deposited pigments. Always do a strand test to verify how the hair reacts. If there are accumulated color layers, a color correction may be needed first.
In summary
- Ombre: Gradient with high contrast (4-6 levels), dramatic, editorial effect
- Sombre: Soft gradient (1-3 levels), natural, “kissed by sun”
- Choose ombre for visible changes, very dark bases, bold looks
- Choose sombre for first services, natural looks, fine or damaged hair
- Both are low maintenance: The gradient grows without a visible demarcation line
- The key is in the transition zone: always blend, never leave a hard line
Want precisely calculated formulas for ombre, sombre and other gradient techniques? Try Blendsor free. AI analyzes your client’s hair and suggests the optimal formulation for each zone.
This article is part of our complete guide to professional coloring techniques. Also explore the differences between balayage vs traditional highlights and how to create dimensional blondes.
Related articles
Practice with our free tools
Calculators, neutralization wheel, AI consultation...
Master this technique with exact formulas
Blendsor generates the precise formula for each technique with your brand products. Try the mix calculator or download the app.
Download free