Babylights: Ultra-Natural Highlights
Master babylights with this step-by-step guide. Ultra-fine highlights that mimic children's hair. Formulas, technique, and mistakes to avoid.
Blendsor
Blendsor Team

Does your client want a change but is afraid it will look “too salon-done”? Is she looking for that natural shine children have in summer, without obvious highlights or strong contrasts?
Babylights are exactly that: highlights so fine they mimic children’s hair. A lightening technique that adds dimension and brightness without screaming “I just got highlights.”
In this guide, you’ll learn the step-by-step technique, formulas for each hair type, and the mistakes to avoid. This article is part of our complete guide to professional coloring techniques.
What Are Babylights and Why Do They Work
Babylights are ultra-fine highlights—almost strand by strand—that are lightened using aluminum foil. The name comes from “baby” because they mimic that natural shine that young children have: barely perceptible strands that catch the light.
According to Behind The Chair, one of the world’s largest professional colorist communities, babylights have become one of the most requested techniques by clients seeking natural results with minimal maintenance.
Characteristic Results
- Subtle dimension: You notice there’s “something” but can’t identify what
- Natural shine: The hair looks healthier and more luminous
- No demarcation lines: Transitions are imperceptible
- “Alive” effect: Breaks the monotony of a flat base
The Science Behind the Technique
Why do fine highlights work so well? The Society of Cosmetic Chemists explains that when we lighten very small sections of hair, the visual effect is diffuse light rather than defined stripes. The human eye doesn’t distinguish individual strands—it only perceives overall luminosity.
It’s the same principle that makes children’s hair look shiny: they have naturally lighter strands mixed with their base tone, creating depth without obvious contrast.
Babylights Step by Step: Complete Technique
Let’s dive into the detailed process. Babylights require patience and precision, but the result is worth every minute invested.
Step 1: Initial Assessment
Before starting, evaluate your client:
- Natural level: Babylights work at any level, but the developer varies
- Goal: Does she want subtle light or a more visible effect?
- History: Does she have previous color? Previous lightening?
- Hair density: Determines how many sections you’ll need
Pro tip: Babylights are ideal for conservative clients who’ve never had highlights. They’re the perfect gateway to lightening services.
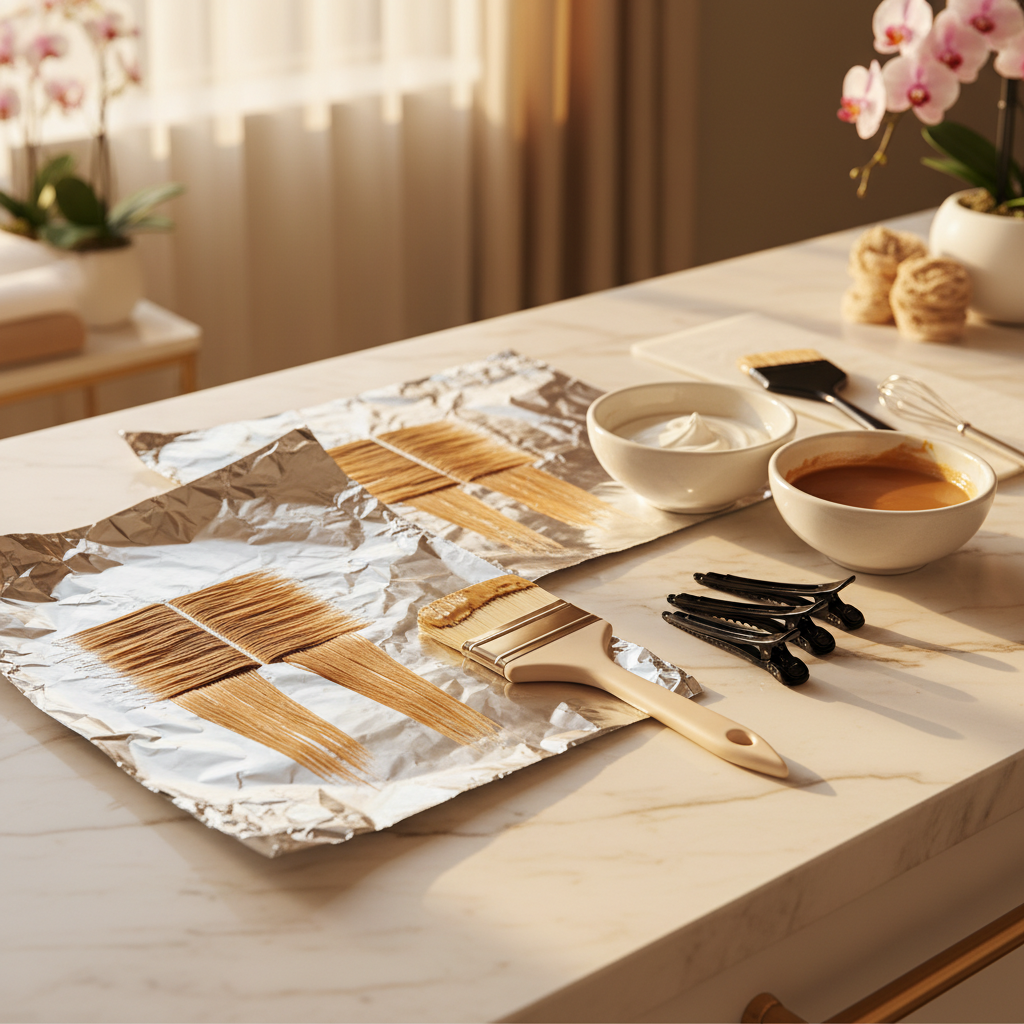
Step 2: Product Preparation
The consistency should be like thick yogurt, not liquid.
Base formula for babylights:
- Gentle lightening powder (preferably ammonia-free if possible)
- 10-20 vol developer based on natural level
- Ratio: 1:2 (powder:developer)
Babylights don’t need extreme power because we work with such fine sections that they lighten easily. Using high-volume developer is unnecessary and can damage the hair.
Step 3: Sectioning the Hair
The key to babylights is in the sections:
- Section thickness: 0.5-1 cm maximum (much finer than regular highlights)
- Pattern: Work from nape toward crown
- Distribution: Throughout the entire head, including hairline
- Density: More sections in visible areas (face frame, crown)
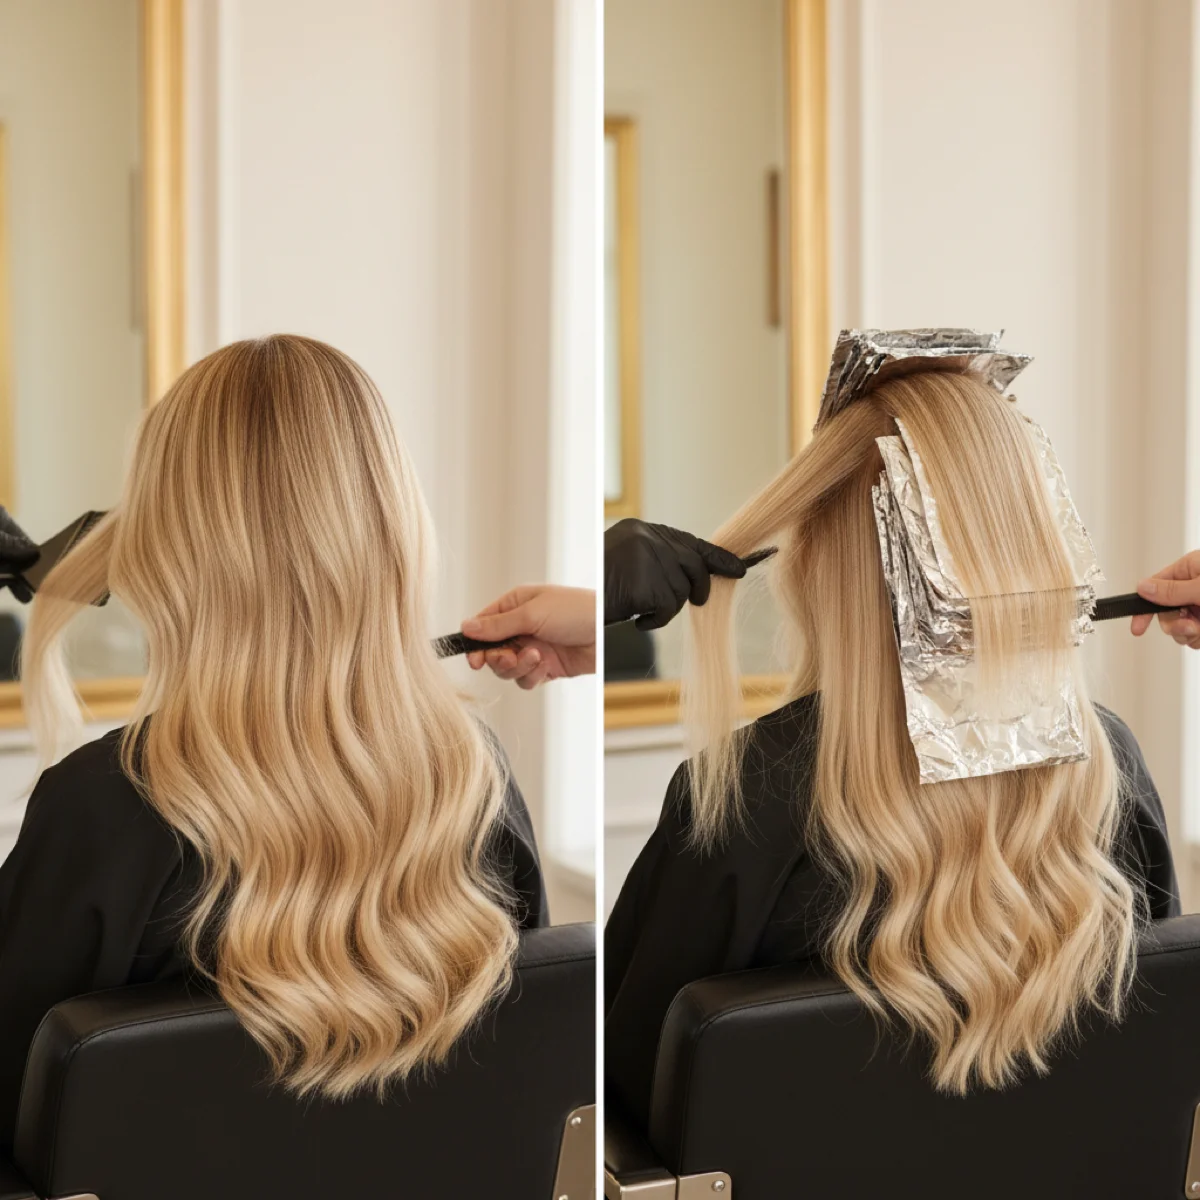
Step 4: Ultra-Fine Weaving Technique
This is where babylights differ from other highlights:
- Place the foil under the section
- Weave with tail comb tip: Take almost individual strands, as if you were sewing
- Less is more: Better to have few well-separated strands than many together
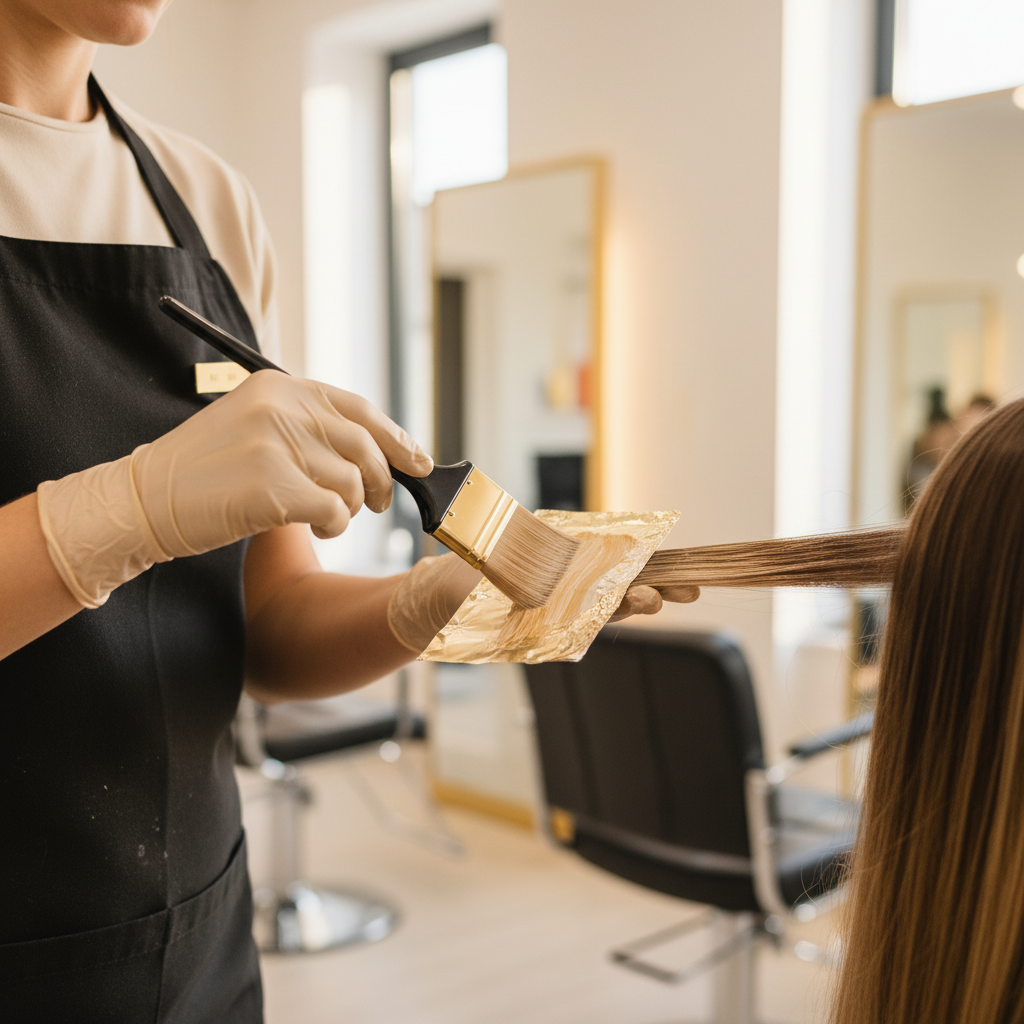
- Apply the product: With a fine brush, saturate each selected strand
- Close the foil without pressing
The weave should be so fine that you barely see product on the foil. If you see a lot of white, you’re taking too much hair.

Step 5: Placement Pattern
For a natural result, follow this pattern:
| Zone | Babylights Density | Purpose |
|---|---|---|
| Lower nape | Low | Just to unify |
| Sides | Medium | Light when hair is up |
| Crown | High | Maximum visible shine |
| Face frame | High | Frame the face |
| Part line | Very high | Focal point of light |

Step 6: Monitor Development
Babylights process faster than traditional highlights because they’re so fine:
- Check every 10 minutes from the first application
- Typical time: 20-35 minutes depending on level and developer
- Look for the undertone: Not the final tone, but the correct underlying pigment
Step 7: Rinse and Finish
- Remove foils carefully
- Emulsify with warm water
- Wash with neutral shampoo
- Tone if needed: Often babylights don’t need strong toner
- Nourishing conditioner
Formulation by Hair Type
Developer choice is crucial. Here are the formulas by natural level:
| Natural Level | Goal | Developer | Estimated Time |
|---|---|---|---|
| 2-4 (dark) | Caramel reflects | 20 vol | 30-35 min |
| 5-6 (medium brown) | Golden highlights | 20 vol | 25-30 min |
| 7-8 (dark blonde) | Extra light | 10-20 vol | 20-25 min |
| 9-10 (light blonde) | Platinum shine | 10 vol | 15-20 min |
To better understand developer chemistry, check our guide to developer volumes.
Example Formula: Babylights on Level 6
Goal: Add dimension and light to light brown
Mix:
- 20g gentle lightening powder
- 40g 20 vol developer

Toner (optional):
- 9.0 + 9.1 (2:1)
- 10 vol developer
- 5-10 minutes
Pro tip: On natural blondes (level 7+), babylights can be done with just 10 vol. The goal isn’t to lighten much—it’s to create dimension. Less is more.

Babylights vs Other Techniques: When to Choose Each
When should you recommend babylights versus another technique? This comparison helps you decide:
| Factor | Babylights | Balayage | Traditional Highlights |
|---|---|---|---|
| Naturalness | Very high | High | Medium |
| Contrast | Very low | Medium | High |
| Maintenance | Medium | Low | Frequent |
| Service time | 90-120 min | 45-75 min | 60-90 min |
| Ideal client | Conservative, first lightening | Seeks natural change | Wants visible contrast |
For a more detailed comparison between techniques, visit our article on balayage vs traditional highlights.
Choose Babylights When:
- Your client has never had highlights and is nervous
- She wants a change that “only she notices”
- She wants to add shine without changing her look
- She has early scattered grays she wants to camouflage
- She already has balayage and wants to add light at crown/face frame
Don’t Choose Babylights When:
- She wants a drastic, visible change
- She’s in a hurry (it’s a time-consuming technique)
- She wants a dark-to-light gradient effect
- She has more than 50% gray (better to cover first)
Winning Combinations with Babylights
Babylights shine especially when combined with other techniques:
Balayage + Babylights
The most popular combination:
- Balayage on mids and ends for natural gradient
- Babylights on face frame and crown for extra light
- Result: Depth with dimension, low maintenance
To master balayage, check our article on foilyage step by step, which shares similar principles.
Lowlights + Babylights
For blondes who want more dimension:
- Lowlights to add depth at roots
- Babylights to maintain shine without monotony
- Result: Multidimensional blonde, not flat
Gray Coverage + Babylights
For clients with scattered grays:
- Soft coverage on base (demi-permanent)
- Babylights to camouflage and distract the eye
- Result: Grays integrate with overall dimension
For mastering gray coverage, check our professional gray hair coverage guide.
Common Mistakes and How to Avoid Them
1. Sections Too Thick
The mistake: Taking strands the thickness of traditional highlights.
The consequence: They’re not babylights—they’re fine highlights. The subtle effect is lost.
The solution: If you can count the hairs in your weave, you’re doing it right. They should be almost individual strands.
2. Concentrating Only in Some Areas
The mistake: Doing babylights only on the crown and forgetting the rest.
The consequence: Uneven effect—it looks like “salon work.”
The solution: Distribute throughout the head, adjusting density by zone.
3. Using Developer That’s Too Strong
The mistake: Thinking 30-40 vol will lighten faster.
The consequence: Unnecessary damage, yellows that are hard to tone.
The solution: Babylights don’t need power. Fine sections lighten easily with 10-20 vol.
4. Not Toning Correctly
The mistake: Leaving babylights with raw underlying pigment.
The consequence: Orange or yellow tones that clash.
The solution: Even though they’re subtle, babylights need soft toning to integrate with the base.
5. Promising Immediate Results on Dark Hair
The mistake: Telling a level 3 she’ll have platinum blonde in one session.
The consequence: Broken expectations, dissatisfied client.
The solution: On dark bases, babylights provide warm reflects (caramel, honey), not cool blondes. Multiple sessions are needed to go further.
Frequently Asked Questions
How Long Do Babylights Last?
Well-done babylights can last 8-12 weeks without visible regrowth. Since they’re so fine, root growth integrates gradually without creating a marked demarcation line. Clients with slow growth can space touch-ups up to 16 weeks.
Do Babylights Damage Hair?
Less than other lightening techniques. By working with such small sections and gentle developers, overall damage is minimal. Most of the hair isn’t even touched. It’s the most hair-integrity-respecting lightening technique.
Can You Do Babylights on Color-Treated Hair?
Yes, but with precautions. Do a strand test to evaluate how previously treated hair responds. Reduce developer (10-20 vol maximum) and monitor development more frequently. Hair with cosmetic color can lift unpredictably.
Babylights or Balayage for First Time?
It depends on your client’s personality. Babylights are ideal for conservatives who want a “secret” change. Balayage is better if she wants something more visible but still natural. Often the best option is to combine both techniques.
In Summary
Babylights are the perfect technique when your client wants:
- Subtle change: Something noticeable but unidentifiable
- Maximum naturalness: As if she’d never set foot in a salon
- Dimension without contrast: Shine and light without obvious stripes
- Moderate maintenance: Without pressure for frequent touch-ups
Mastering babylights opens doors to a segment of clients who avoid lightening services out of fear of artificial results. It’s the perfect gateway to build loyalty and then propose more visible techniques as they gain confidence.
Want to calculate exact formulas for your babylights services? Try Blendsor free. The AI analyzes your client’s hair and suggests the optimal formulation based on her level and desired result.
This article is part of our complete guide to professional coloring techniques. Explore other techniques like foilyage, balayage, and color melting.
Related articles
Practice with our free tools
Calculators, neutralization wheel, AI consultation...
Master this technique with exact formulas
Blendsor generates the precise formula for each technique with your brand products. Try the mix calculator or download the app.
Download free