Foilyage Step by Step: Pro Formulas
Master foilyage with this step-by-step technical guide. Real formulas, when to use it, and mistakes to avoid. Perfect for dark hair.
Blendsor
Blendsor Team

Does your client want that natural “sun-kissed” look but has level 3 or 4 hair? You know classic balayage won’t lift enough. And traditional highlights will look too stripy on her.
If this sounds familiar, foilyage is your answer.
This technique combines the best of balayage (natural finish) with the lifting power of foil. It’s part of our complete guide to professional coloring techniques, and in this article you’ll learn exactly how to execute it, which formulas to use, and the mistakes you need to avoid.
What Is Foilyage and Why It Works
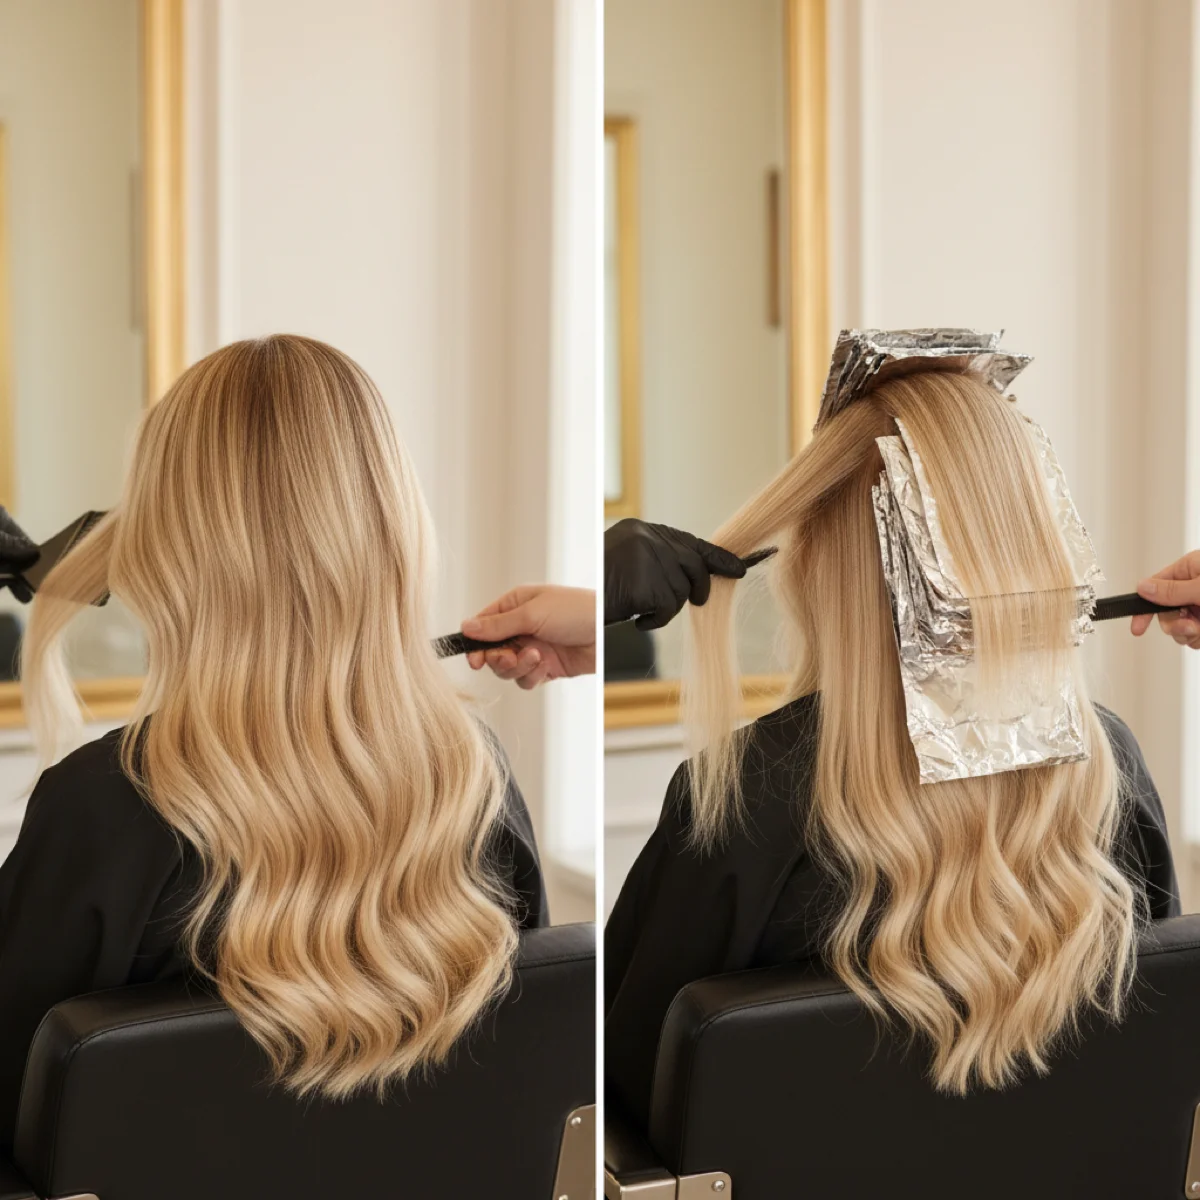
Foilyage is a hybrid technique that fuses the sweeping motion of balayage with aluminum foil isolation. You apply the product with freehand brush strokes, then wrap the section in foil to boost the lightening power.
Why does it work so well? The answer lies in chemistry. According to the Society of Cosmetic Chemists, aluminum foil traps body heat and creates a closed environment that:
- Accelerates oxidation of the lightening product
- Increases lifting power by 1-2 extra levels
- Maintains moisture keeping the product active longer
The result is a natural gradient like balayage, but with the ability to lift resistant or dark hair.
Pro tip: Foilyage is the technique of choice when your client has level 2-5 hair and wants balayage-style results. It delivers what open-air balayage cannot.
Foilyage Step by Step: Complete Technique
Foilyage is performed in 7 steps:
- Assess and prepare: Analyze natural level, color history, and target tone.
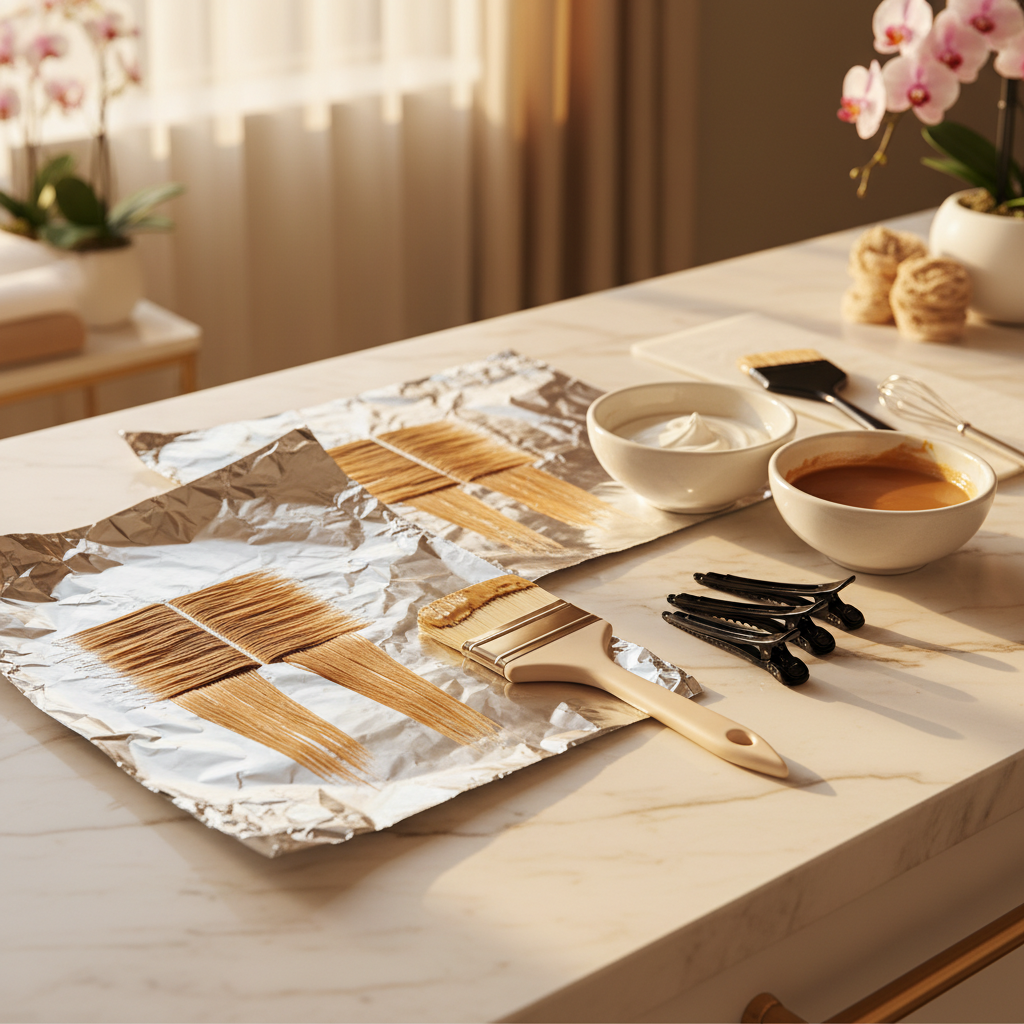
- Prepare the product: Mix lightening powder with developer (1:2) to thick yogurt consistency.
- Section the hair: Work from nape to crown; face frame last.
- Apply with sweeping motion: Saturate ends, less product on mids, barely a touch at roots.
- Close the foil: Fold sides first, close without compressing; leave an air pocket.
- Monitor development: Check every 10-15 minutes looking for the correct underlying pigment.
- Rinse and tone: Emulsify, wash, and apply toner for 5-15 minutes based on target tone.
Below, each step in detail.
Step 1: Assessment and Preparation
Before mixing anything:
- Assess your client’s natural level
- Review their history: Previous color? Past lightening services?
- Define the goal: What final tone are they after? Caramel, honey, ash blonde?
- Do a strand test if there’s any doubt about hair integrity
Check our colorimetry basics guide if you need a refresher on levels and underlying pigments.
Step 2: Product Preparation
Product consistency is key. It should be like thick yogurt, not runny.
Base formula for foilyage:
- Lightening powder (preferably with clay for adhesion)
- Developer based on goal (see next section)
- Ratio: 1:2 (powder:developer)
Mix until you get a paste that holds on the brush without dripping.
Step 3: Sectioning the Hair
Work in panels, from bottom to top:
- Nape (lower panels)
- Sides (above the ears)
- Crown (top section)
- Face frame (last, with finer sections)
Save the face frame for last because it’s the most visible area and deserves special attention.

Step 4: Product Application (The Sweeping Technique)
This is where foilyage differs from traditional highlights:
- Place the aluminum foil underneath the selected section
- Saturate the ends first: Load your brush and work the ends generously
- Move up toward the mids with less product: The brush is already half-empty
- Feather the root area: Just a light touch, never saturated
- Sweeping technique: Vertical strokes from bottom to top, not horizontal
The key is gradual saturation: heavy on ends, light toward roots.

Step 5: Closing the Foil
Once product is applied:
- Fold the foil on the sides first
- Close at the bottom without pressing too hard
- Don’t compress the product against the hair
- Let the foil form an “air pocket”
Step 6: Monitoring Development
Foilyage processes faster than open-air balayage because of the foil’s heat retention.
- Check every 10-15 minutes starting from the first section applied
- Open the foil from the bottom to check color without dismantling everything
- Look for the correct underlying pigment, not the final tone
You’ll achieve the final tone with toner afterward. Right now, you’re looking for the right underlying pigment based on your desired result.
Step 7: Rinse and Toning
- Remove the foil carefully
- Emulsify with warm water before rinsing completely
- Wash with neutral shampoo or one specific for lightened hair
- Apply toner according to target tone
- Toner timing: 5-15 minutes depending on desired intensity
Foilyage Formulas by Starting Level
Developer choice determines the result. Here are formulas based on your client’s natural level:
| Natural Level | Goal | Developer | Estimated Time |
|---|---|---|---|
| 2-3 (very dark) | Caramel/chocolate | 30 vol | 35-45 min |
| 2-3 (very dark) | Honey/blonde | 30-40 vol | 40-50 min |
| 4-5 (medium brown) | Caramel | 20-30 vol | 30-40 min |
| 4-5 (medium brown) | Blonde | 30 vol | 35-45 min |
| 6-7 (dark blonde) | Luminous blonde | 20 vol | 25-35 min |
For a deeper understanding of developer chemistry, check our developer volumes guide.
Example Formula: Foilyage on Level 4
Goal: Honey effect with lighter ends
Mix:
- 30g lightening powder with clay
- 60g 30 vol developer

Toner:
- 8.3 + 9.0 (1:1)
- 10 vol developer
- 10 minutes
Pro tip: On virgin level 4-5 hair, foilyage can achieve 4-5 levels of lift. On previously colored hair, expect 2-3 levels maximum and adjust expectations accordingly.
Foilyage vs Balayage vs Highlights: When to Choose Each
Not every technique works for every client. This table helps you decide:

| Factor | Foilyage | Balayage | Traditional Highlights |
|---|---|---|---|
| Natural look | High | Very high | Medium |
| Lifting power | High | Medium | High |
| Dark hair | Ideal | Limited | Works |
| Maintenance | Low | Very low | High |
| Time | 60-90 min | 45-75 min | 60-90 min |
Choose foilyage when:
- Your client has level 2-5 hair and wants a natural effect
- You need more lift than balayage but without harsh lines
- The hair is resistant or coarse
- They want low maintenance with powerful results
Choose balayage when:
- The hair is level 6 or lighter
- They want the most subtle effect possible
- The hair is fine or sensitized
- They prefer a gentler process
Choose traditional highlights when:
- They want defined, high contrast
- It’s a dramatic first-time lightening service
- You need gray coverage with the technique
For a more detailed comparison, visit our article on balayage vs traditional highlights.
Common Foilyage Mistakes and How to Avoid Them
After seeing hundreds of foilyages (both good and bad), these are the mistakes that come up most often:
1. Even Saturation Throughout the Section
The mistake: Applying the same amount of product from ends to roots.
The consequence: Roots too light, artificial effect.
The solution: Always more product on ends, tapering upward. Ends should look soaked, mids with visible product, and the root area with barely a touch.
2. Closing the Foil Too Tight
The mistake: Compressing the foil against the hair like traditional highlights.
The consequence: Pressure marks, uneven lift, unwanted lines.
The solution: The foil should form a loose “pocket.” Close the sides and bottom, but leave space for the hair to “breathe.”
3. Not Adapting Developer to Level
The mistake: Using 40 vol on all hair “just to be safe.”
The consequence: Unnecessary damage, brassy yellows difficult to tone, breakage.
The solution: Adjust volume according to the table above. Level 6 hair doesn’t need 40 vol to achieve beautiful blondes.
4. Starting at the Crown
The mistake: Applying to the top of the head first.
The consequence: First sections over-process while you finish the last ones.
The solution: Always bottom to top. Nape first, crown last.
5. Skipping the Strand Test
The mistake: Assuming the hair will respond well without checking.
The consequence: Unpleasant surprises with previously treated hair.
The solution: When in doubt, do a test. The Professional Beauty Association recommends always performing strand tests on chemically treated hair. It takes 20 minutes and saves you hours of correction.
Frequently Asked Questions
Can you do foilyage on previously lightened hair?
Yes, but with caution. Assess porosity and do a mandatory strand test. Use gentler developer (20 vol maximum) and check development every 5 minutes. Previously processed hair lifts faster and is more susceptible to damage.
How long does foilyage last?
Well-executed foilyage can last 3-4 months without visible regrowth. Since the root grows in diffused (not with a harsh line), growth integrates naturally. This makes it ideal for clients who prefer spaced-out visits.
Is foilyage more expensive than balayage?
It depends on the salon, but they’re generally in the same price range because they require similar time and skill. What is true: foilyage can save your client money long-term due to lower maintenance.
Can I combine foilyage with other techniques?
Highly recommended. The most effective combinations are: foilyage on mids and ends + babylights on the face frame to frame the face, or foilyage with lowlights to add depth. Combining techniques is what separates good colorists from exceptional ones.
What do I do if the foilyage has banding?
If unwanted demarcation lines appear, you have two options: apply a gentle color melt to blend the transitions, or do surface babylights to visually break up the lines. Never re-lighten directly over the bands.
In Summary
Foilyage is the perfect technique when you need the best of both worlds:
- Balayage’s natural look: Smooth transitions, no harsh lines
- Highlights’ power: Ability to lift dark or resistant hair
- Low maintenance: Diffused roots that grow out seamlessly
Mastering this technique expands your repertoire as a colorist and lets you offer solutions to clients who previously had to choose between natural effect and powerful results. They don’t have to choose anymore.
Want to calculate exact formulas for your foilyage services? Try Blendsor free. The AI analyzes your client’s hair and suggests optimal formulations for each technique.
This article is part of our complete guide to professional coloring techniques. Explore other techniques like balayage, babylights, and color melting.
Related articles
Practice with our free tools
Calculators, neutralization wheel, AI consultation...
Master this technique with exact formulas
Blendsor generates the precise formula for each technique with your brand products. Try the mix calculator or download the app.
Download free